Showing posts with label tutorial. Show all posts

March 28, 2011

Flowers for you...a tutorial!


I made these darling Button Flower Bouquets for my fellow Dream Girl attendees...and wanted to share them with you, too!


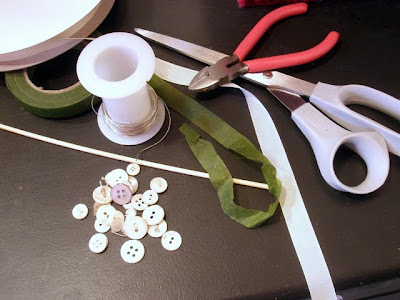
Supplies you will need:

Buttons!
Wire (22 or 24 gauge)
(or whatever you have that can bend easy)
Skewer or small dowel
Scissors
Wire cutters
Floral tape
Ribbon


Wrap wire around skewer and then clip to desired length for stamens...about 1 inch.

Cut piece of wire for stem about 6-8 inches long. Bend in half and insert into buttons starting with button you want on top. Before you cinch down and twist add curved stamen wire. Twist tight.

Gather your button flowers and wrap with floral tape. Trim bottom wires flush.

Wrap with ribbon starting at the top of the stem leaving a tail. Wrap to the bottom and come back up and tie the ribbon to the top tail. Trim ribbon.


Now you have a beautiful Button Flower Bouquet to give as a gift, pin on your lapel or tuck in a special place to bring a smile to your face every time you see it!

January 24, 2011

A Tutorial and Christentine Greetings

 Back on December 20, 1990 when we bought our Little House, we didn't have a Christmas tree. It just wasn't going to happen that year. So when I came home from work on January 25, 1991, Doug had purchased a living evergreen tree and had decorated it with Valentines and proclaimed it Christentine! So tomorrow is the 20 year anniversary of the first Christentine. We celebrate it every year with a 'Happy Christentine!' and some kind of blended decor. It works for me...no rush to get the holiday tree down and I love red! Our newly redone bathroom is the perfect Valentine-y space with its red ceiling and black and white accents so the tinsel tree that was in there was the logical choice.


Pink dove from Ormolulu,
Red Feather Butterfly from Bountiful Home
and
Valentine Fat Book from a Red Lead Swap.
For the December 2nd Saturdayz Urban Market I had made some Ribbon Wrapped Wire Stocking ornaments and then for gift pizzazz I made some Initial ornaments. So here is a quick tutorial for Ribbon Wrapped Wire Hearts.

You will need:


18-gauge wire
Pliers (round nose, smooth nose, or needle nose)
Wire cutters
Ribbon (I used Midori silk, double-faced satin and velvet)
Ruler
Scissors
Bling


Cut wire to about 14" long. Use round nose pliers to make loop and then bend wire by hand into your shape.

Attach end of wire around inside of first loop and crimp closed with pliers.

Cut 1 to 1 1/2 feet of ribbon to wrap around wire (depends on  how large you make your heart).
Tie around wire at top of heart. Leave a little tail at the top.

Wrap, overlapping slightly each time around.

When you reach the end, tie off at the top to the existing tail of your starter knot.
Trim ends as you like.
A group of hearts....
You can add bling to your loop or bend up with pliers for hanging.
Here I added a chandelier crystal to the pink heart.
But it could be beads, charms, another heart.
Happy Christentine!